
Description
This article provides steps to configure LDAP server in FortiGate and how to map LDAP user in IPv4 policy.
Solution
To configure the FortiGate unit for LDAP authentication – Using GUI:
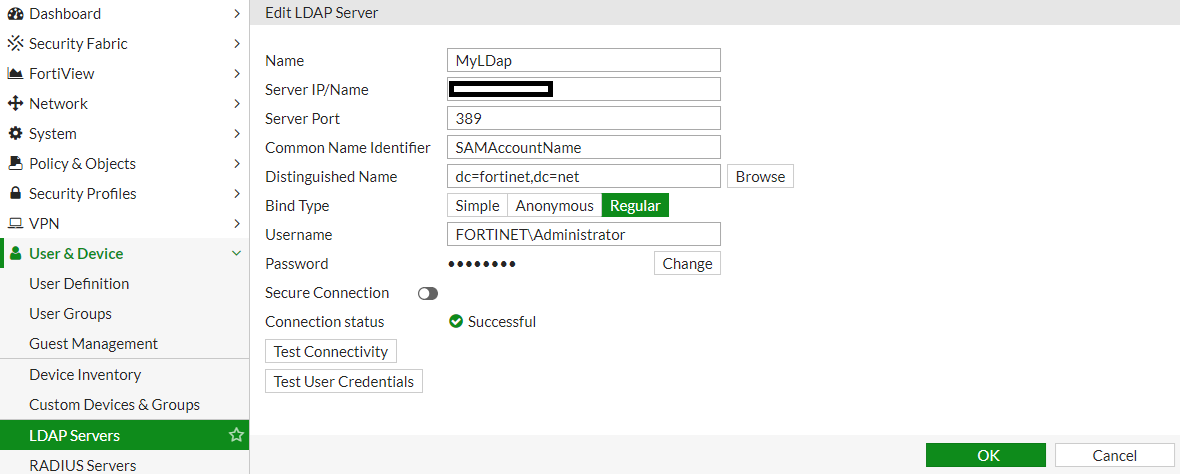
1) Go to User & Device -> Authentication -> LDAP Servers and select Create New.
2) Enter a Name for the LDAP server.
3) In Server Name/IP enter the server’s FQDN or IP address.
4) If necessary, change the Server Port number. The default is port 389.
5) Enter the Common Name Identifier (20 characters maximum).
cn is the default, and most of the customers will be using SAMAccountName. Cn is common name which is a display name and SAMAccountName is the logon name(In reference to windows LDAP server).
6) For Distinguished name, click on browse and select the main domain (Kindly select the domain once the Username and Password are entered as per step 8 and 9)
7) In Bind Type, select Regular.
8) In Username, enter the LDAP administrator’s name along with the domain (Ref.Screenshot below).
9) In Password, enter the LDAP administrator’s password.
10) Select OK.
To import users from LDAP follow the below steps – GUI:
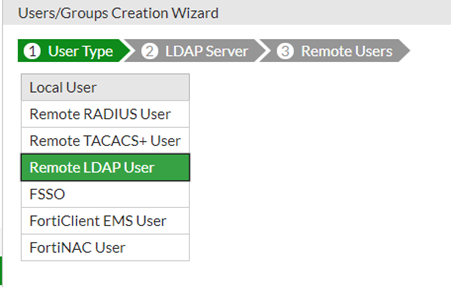
1) Go to User & Devices -> User Definition > Create New.
2) On ‘User Type’, chosse ‘Remote LDAP user’ and click ‘Next’
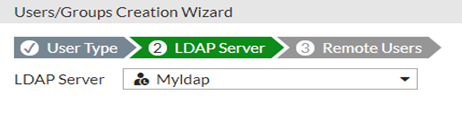
3) On ‘LDAP Server’, Select the LDAP server name and click ‘Next’4) Select the User. Right Click, choose + Add Selected and click “Submit”
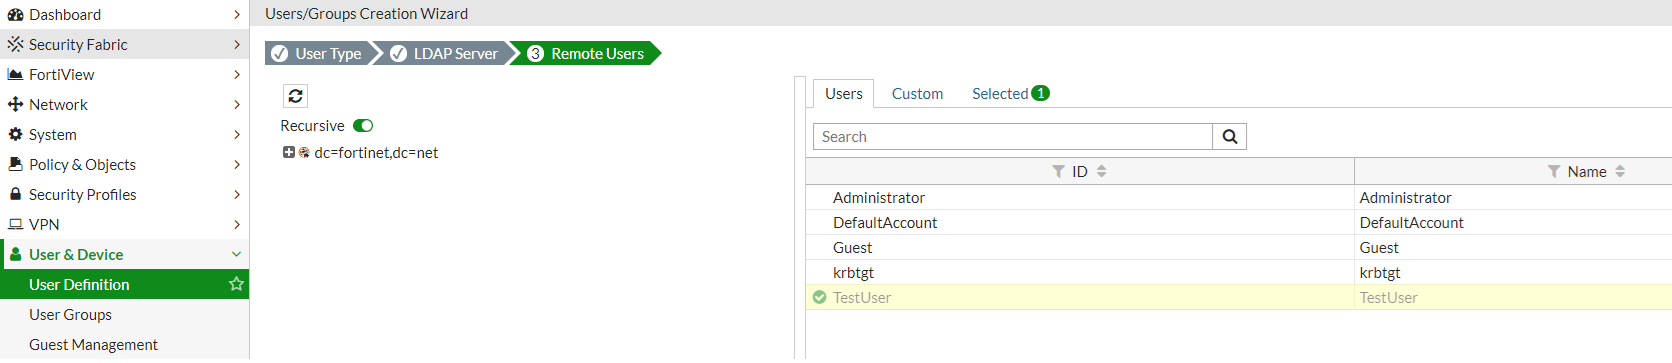
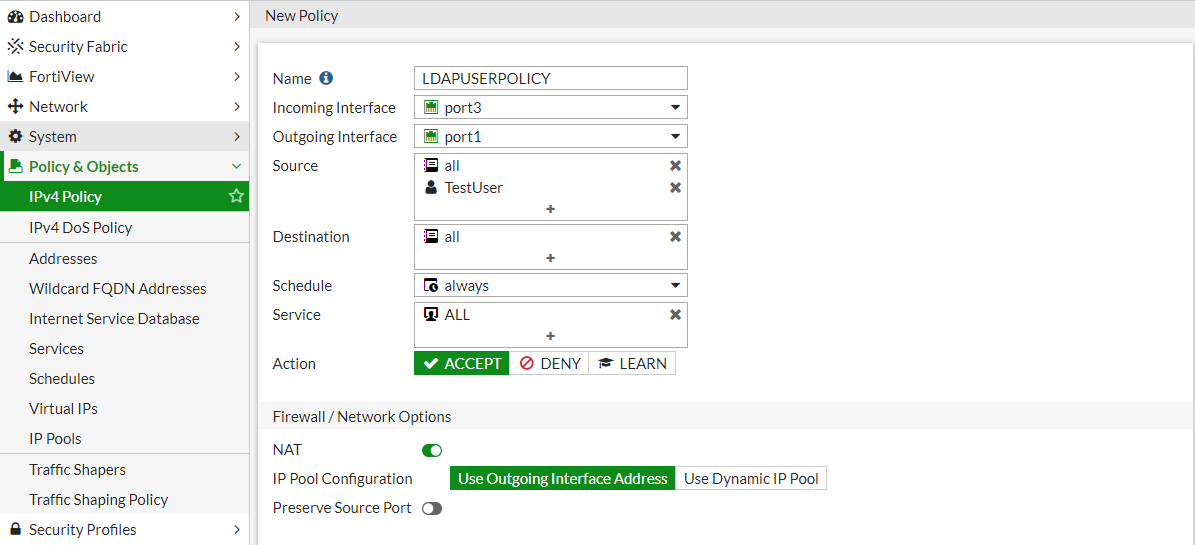
Once Users/Groups are imported, use them in IPv4 policy
Note: LDAP authentication supports HTTP, HTPPS, FTP and Telnet Protocols only
Reference: Technical Tip: How to configure LDAP server – Fortinet Community
Comments are closed